Time Travellers – WIP 14
Recently I started to play with Blender and while having some fun on the hair creation I thought about processes I could use on my Artwork using Ornatrix in max. I had the same experience in the past when working on Vray and suddenly had ideas to translate to my Mental Ray workflow. Ah Brain.
J’ai récemment commencé à triturer Blender et alors que je jouais avec son système de cheveux j’ai eu des idées concernant mon illustration et la création de cheveux avec Ornatrix dans Max. le même genre d’expérience m’est arrivée il y a quelques années en testant Vray qui m’avait donné des idées à transposer sur Mental Ray. Le cerveau.

The bolo balls monster
One of the character will have more or less long hairs covering the bed. Instead of painting the hair guides precisely the way I wanted them, I roughly painted the main direction, in the top viewport, and let the “Gravity” + “Push away from surface” modifiers do the job. It worked!
Un des personnages de mon illustration aura des cheveux plus ou moins longs qui couvriront le lit. Au lieu de dessiner les guides aussi précisément que je le désirais, j’ai brièvement dessiné les courbes en vue de dessus et les modificateur “Gravity” + “Push away from surface” ont fait le reste !
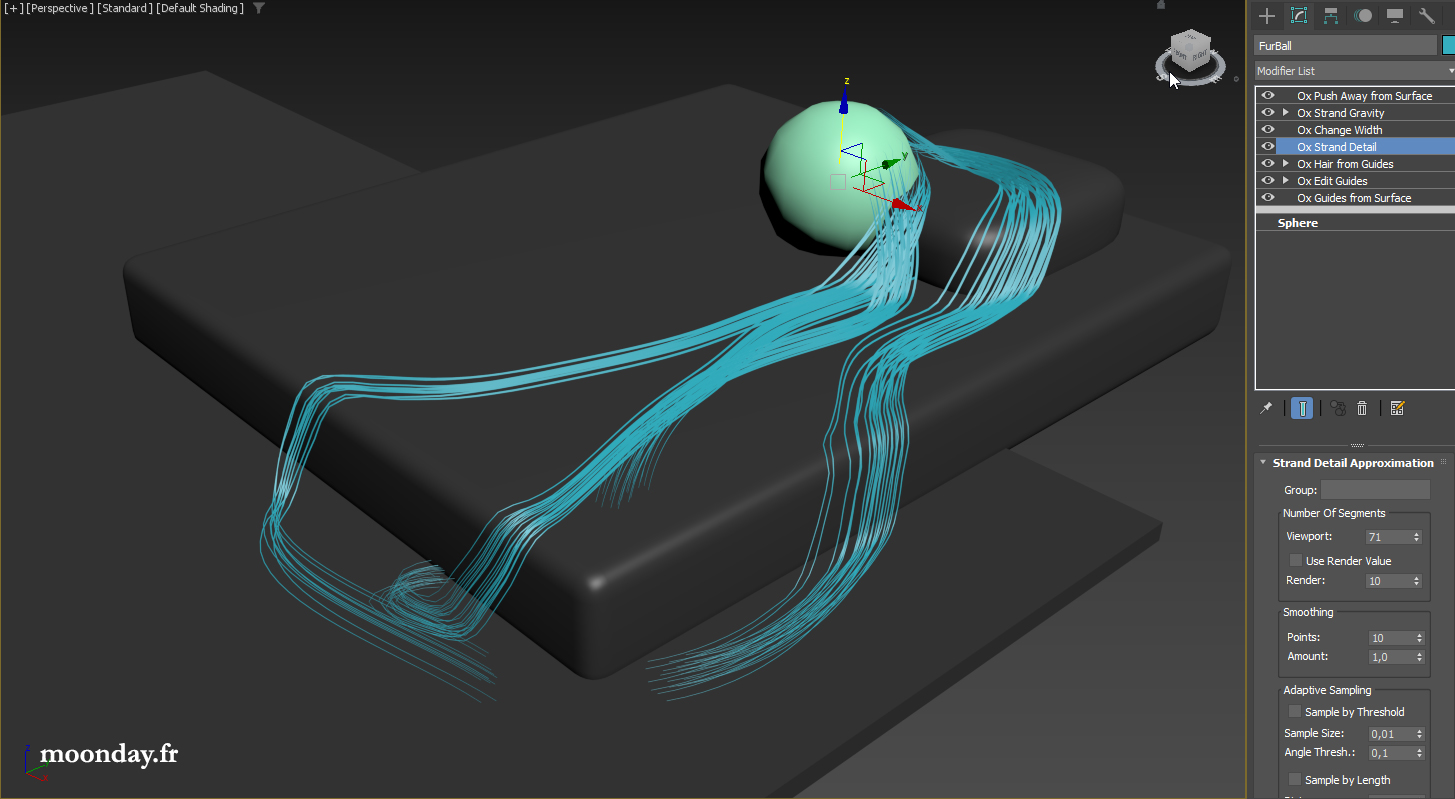
Initial test
Then I tried to randomize these straight hair with some “Frizz” and “Curl modifiers”, I also played with a “Hair multiplier” modifier and it started to look pretty close to what I had in mind.
En ajoutant d’autres modifiers Ornatrix comme “Frizz”, “Curling” ou encore “Hair multiplier”, je commençais à approcher du look qui me trottait en tête depuis quelques temps.
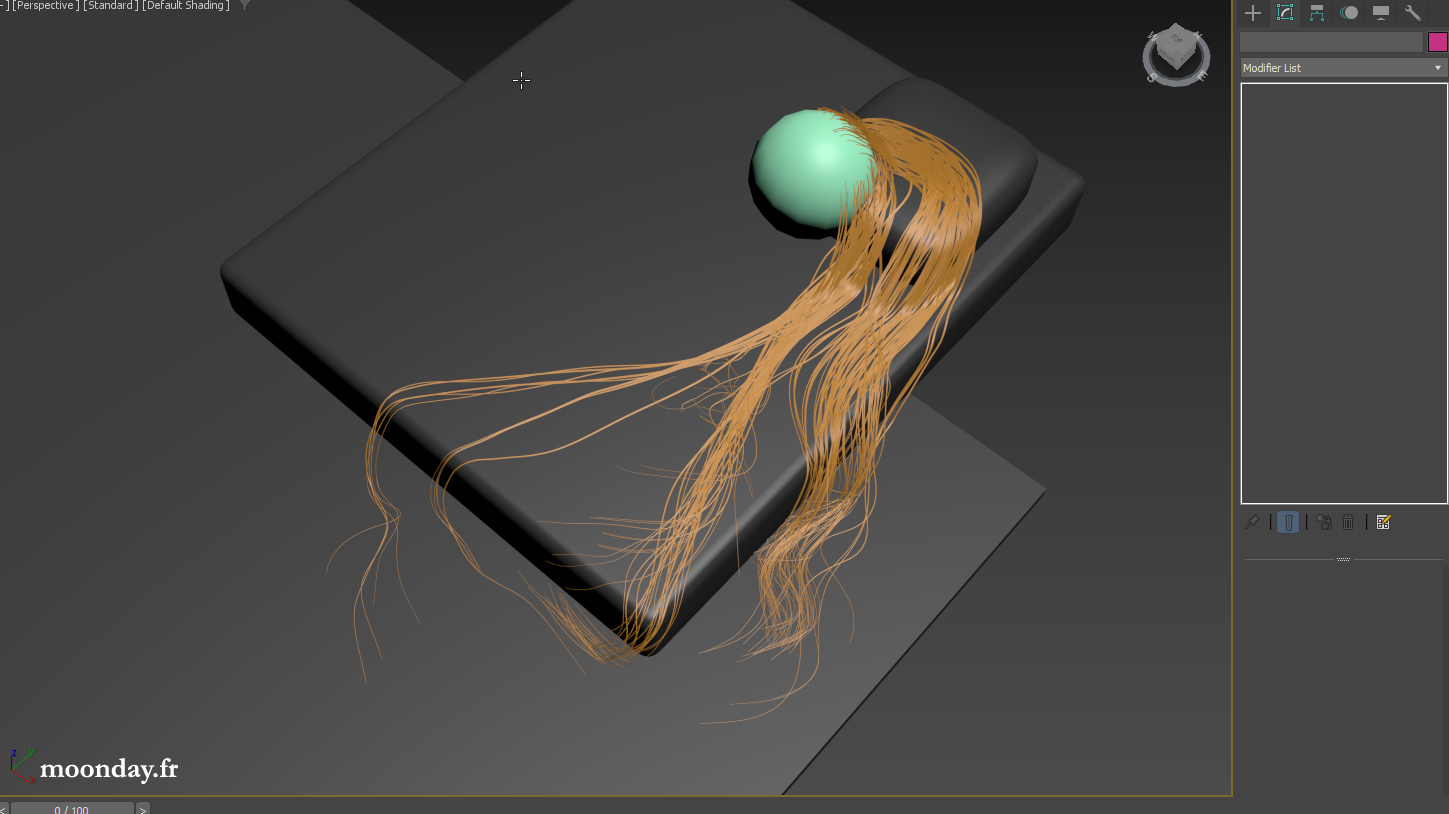
This workflow is still in progress, in the end I’ll add a few more Ornatrix modifiers

Of course, this process is half procedural
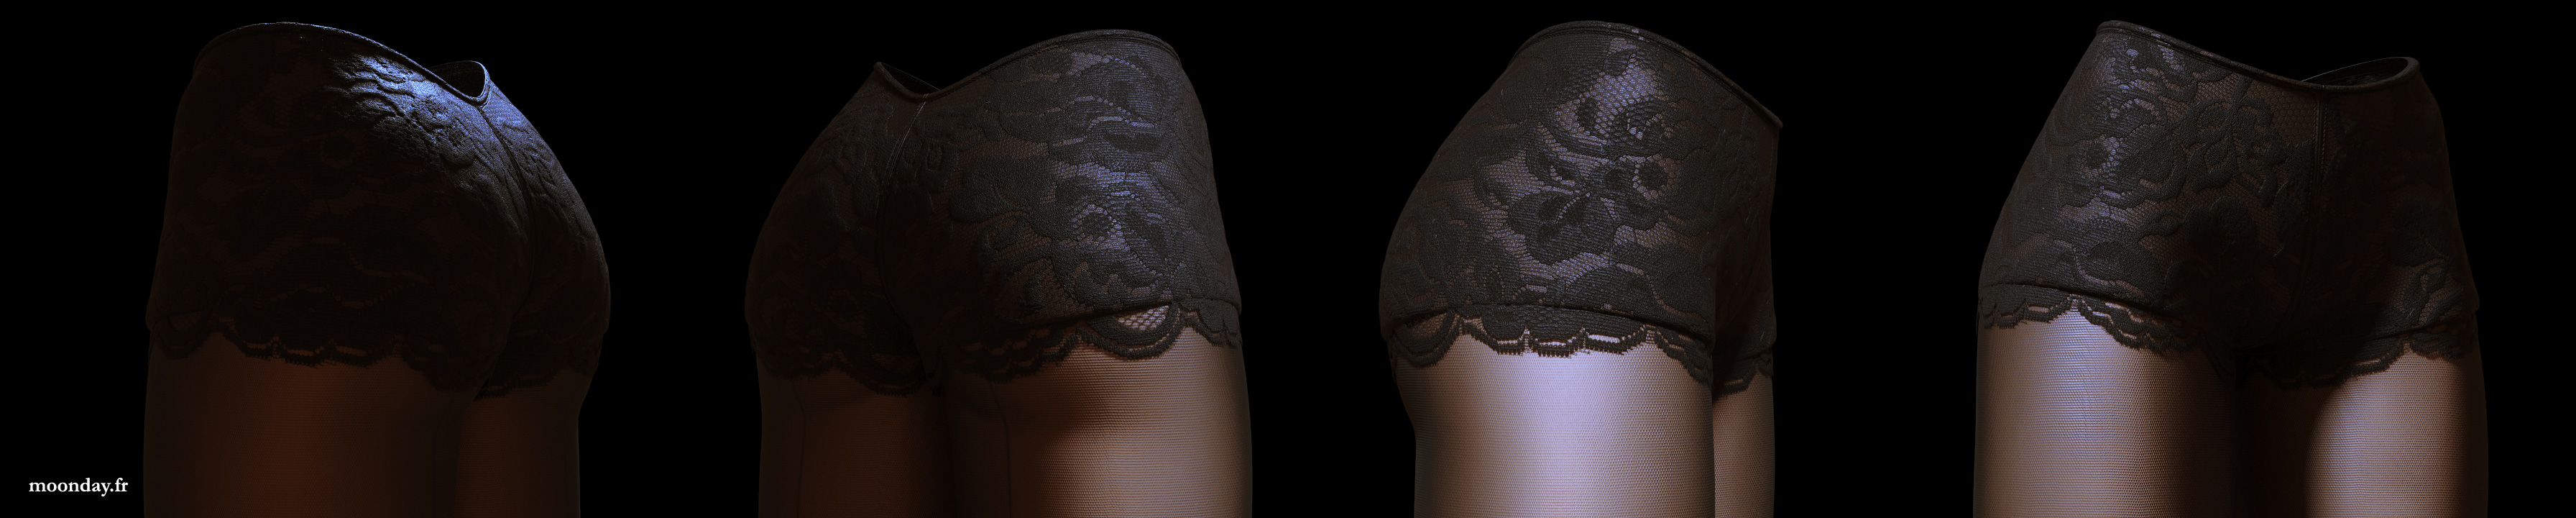
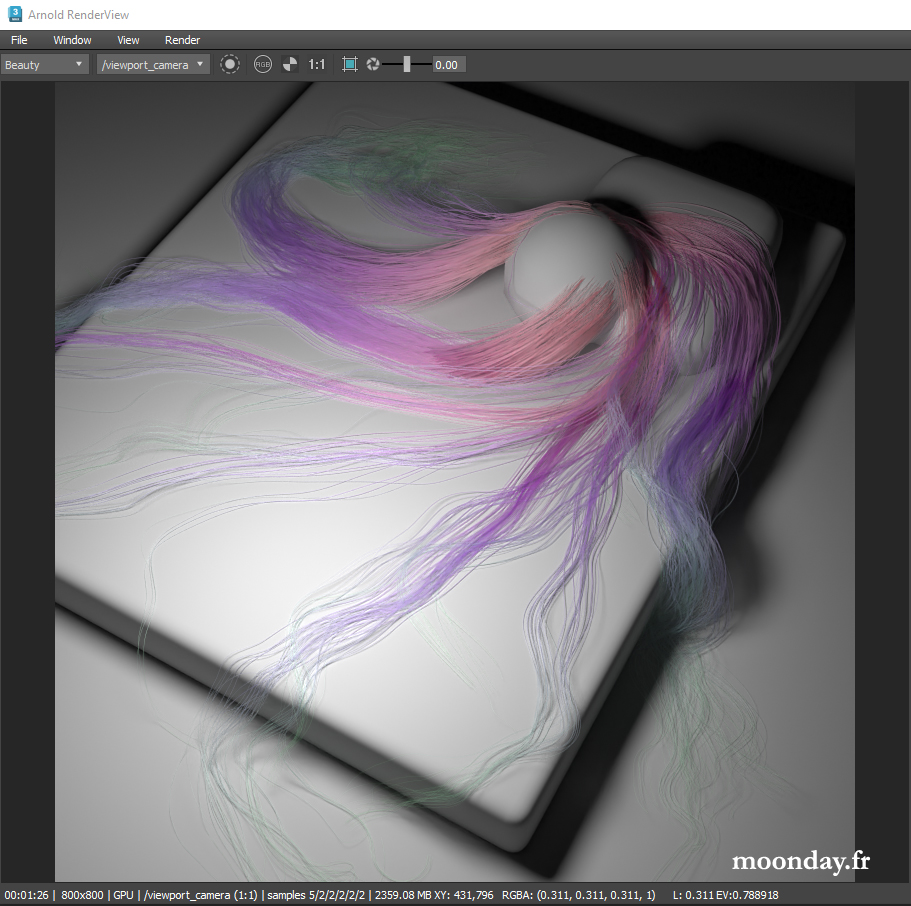
Hair volume and shapes are good but what about the material? Using a Ramp RGB node (implicit UVs turned on) plugged in the diffuse slot of a Standard Hair material we can have whatever color we want along the hair BUT we start to have an issue if we want random color per strand. Of course there is a “Melanin randomize” option but what if we want real RGB random values on our initial diffuse color or ramp?
La masse de cheveux étant modélisée, qu’en est-il du shader ? En utilisant un Ramp RGB (activer implicit Uvs) dans un shader Standard Hair nous pouvons obtenir des couleurs le long des cheveux MAIS la suite est un peu plus complexe si nous désirons avoir une couleur différente par cheveux. Bien sûr il existe l’option ‘Melanin Randomize’ mais si l’effet recherché est un changement aléatoire de valeurs RGB dans la couleur diffuse ou le dégradé initial, il va falloir utiliser une autre méthode.
Original ramp without random color per strand
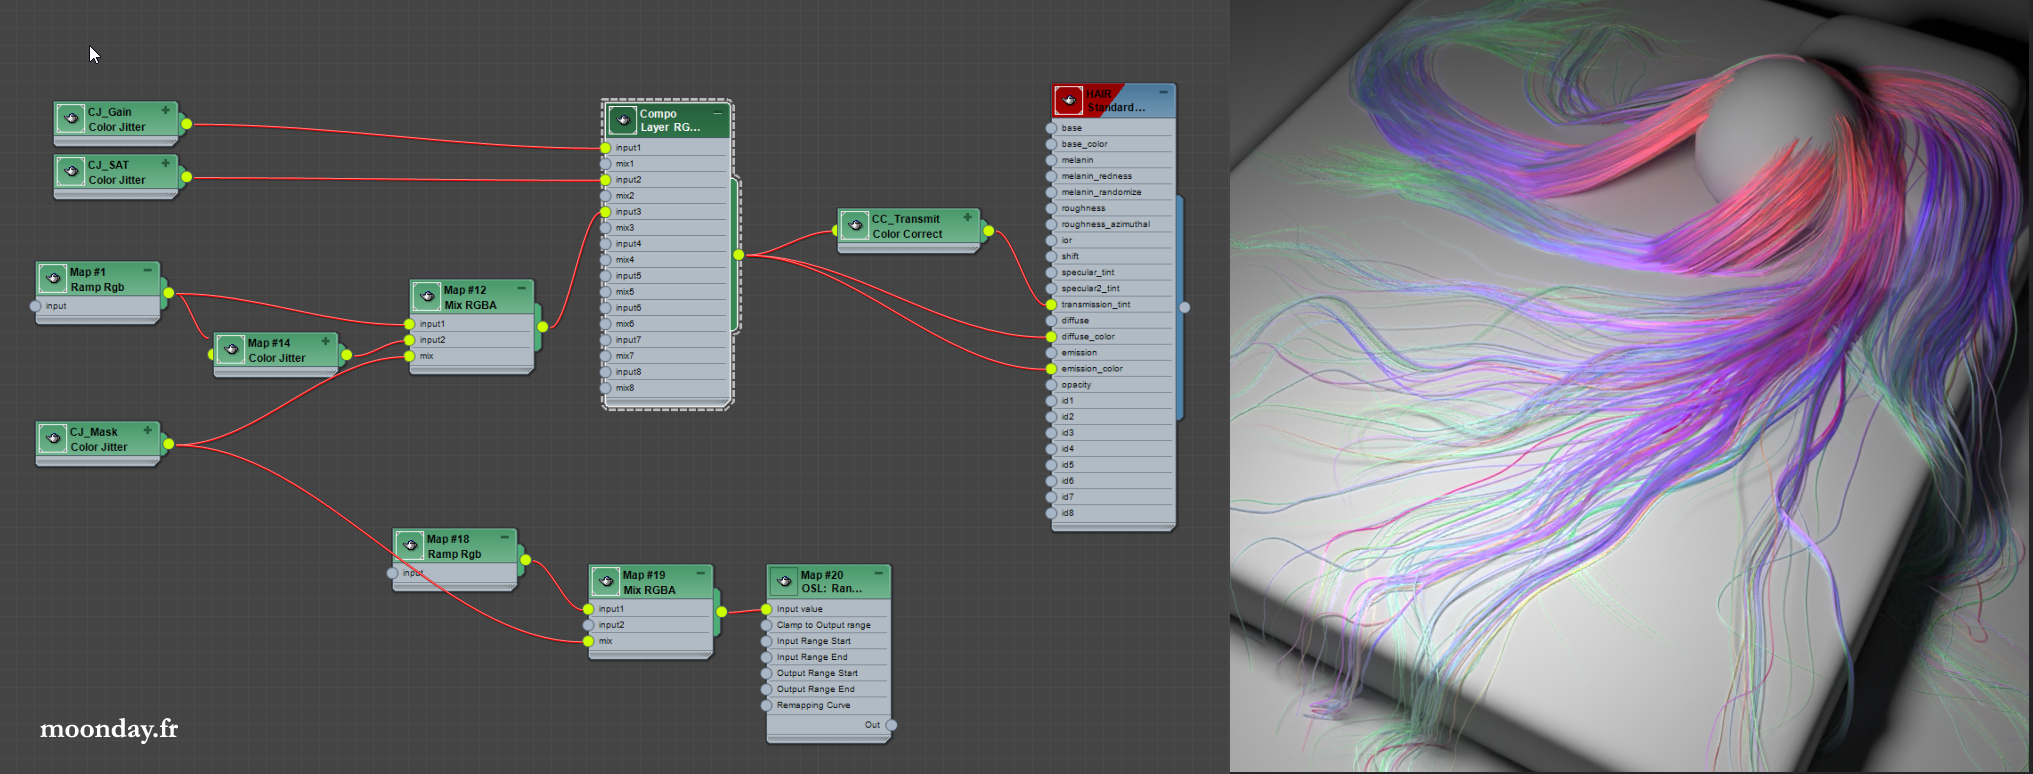
The solution was to use a Color jitter node using the “face” section with “uniform ID” option turned on and then by playing with the randomness in the Saturation, Hue, etc. It works like a charm. It’s up to hue ಠ_ಠ to plug all the nodes in a layer node to precisely get the desired transfer mode and results.
La solution consiste à utiliser un node “Color jitter”, en allant dans la section ‘Face’ en prenant soin de choisir ‘uniform id’ dans ‘Face mode’. Il ne reste plus qu’à jouer avec les valeurs de Hue, Saturation Min/Max, etc. Libre à vous de brancher tous les nodes dans un ‘Layer’ afin d’obtenir plus de précision quant au mix et modes de transfert qui vous donneront le résultat final parfait !
I’ll go more in details in the future making of article
Here I turned the diffuse value really high but if you want more specular you can lower the diffuse value to get a more natural look. The diffuse section of the Standard Hair shader works like this: think of it like adding raw paint on your real hairs, the specular will vanish.
Ici j’ai exagéré la valeur de diffuse mais vous pouvez obtenir un résultat plus naturel, plus de specular, en baissant la valeur du diffuse. Le diffuse fonctionne un peu de la sorte : imaginez que vous appliquiez de la peinture sur vos vrais cheveux, une fois sec les reflets disparaissent.
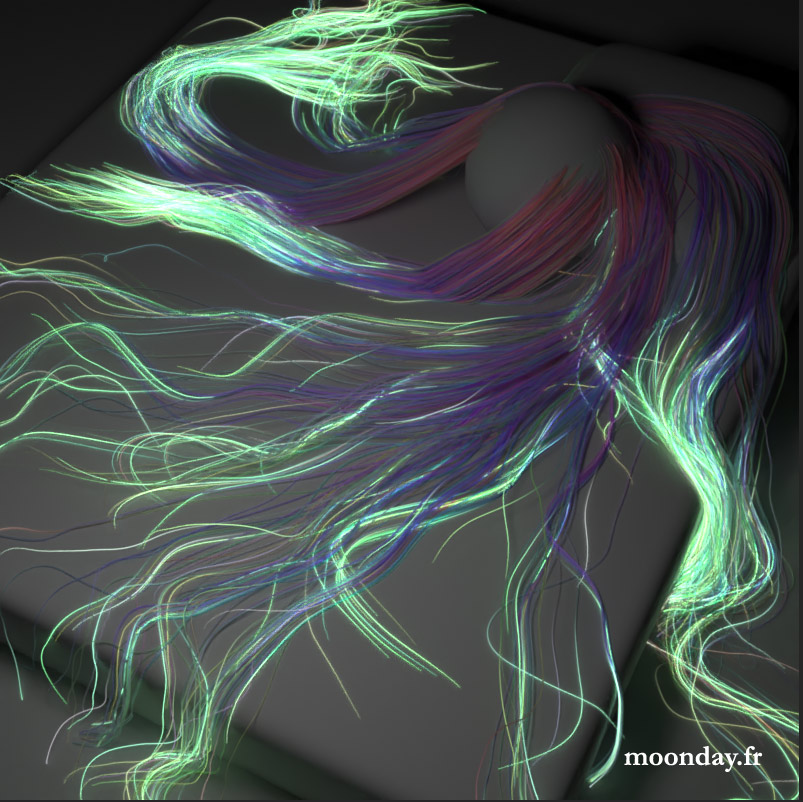
Emissive driven by a ramp node
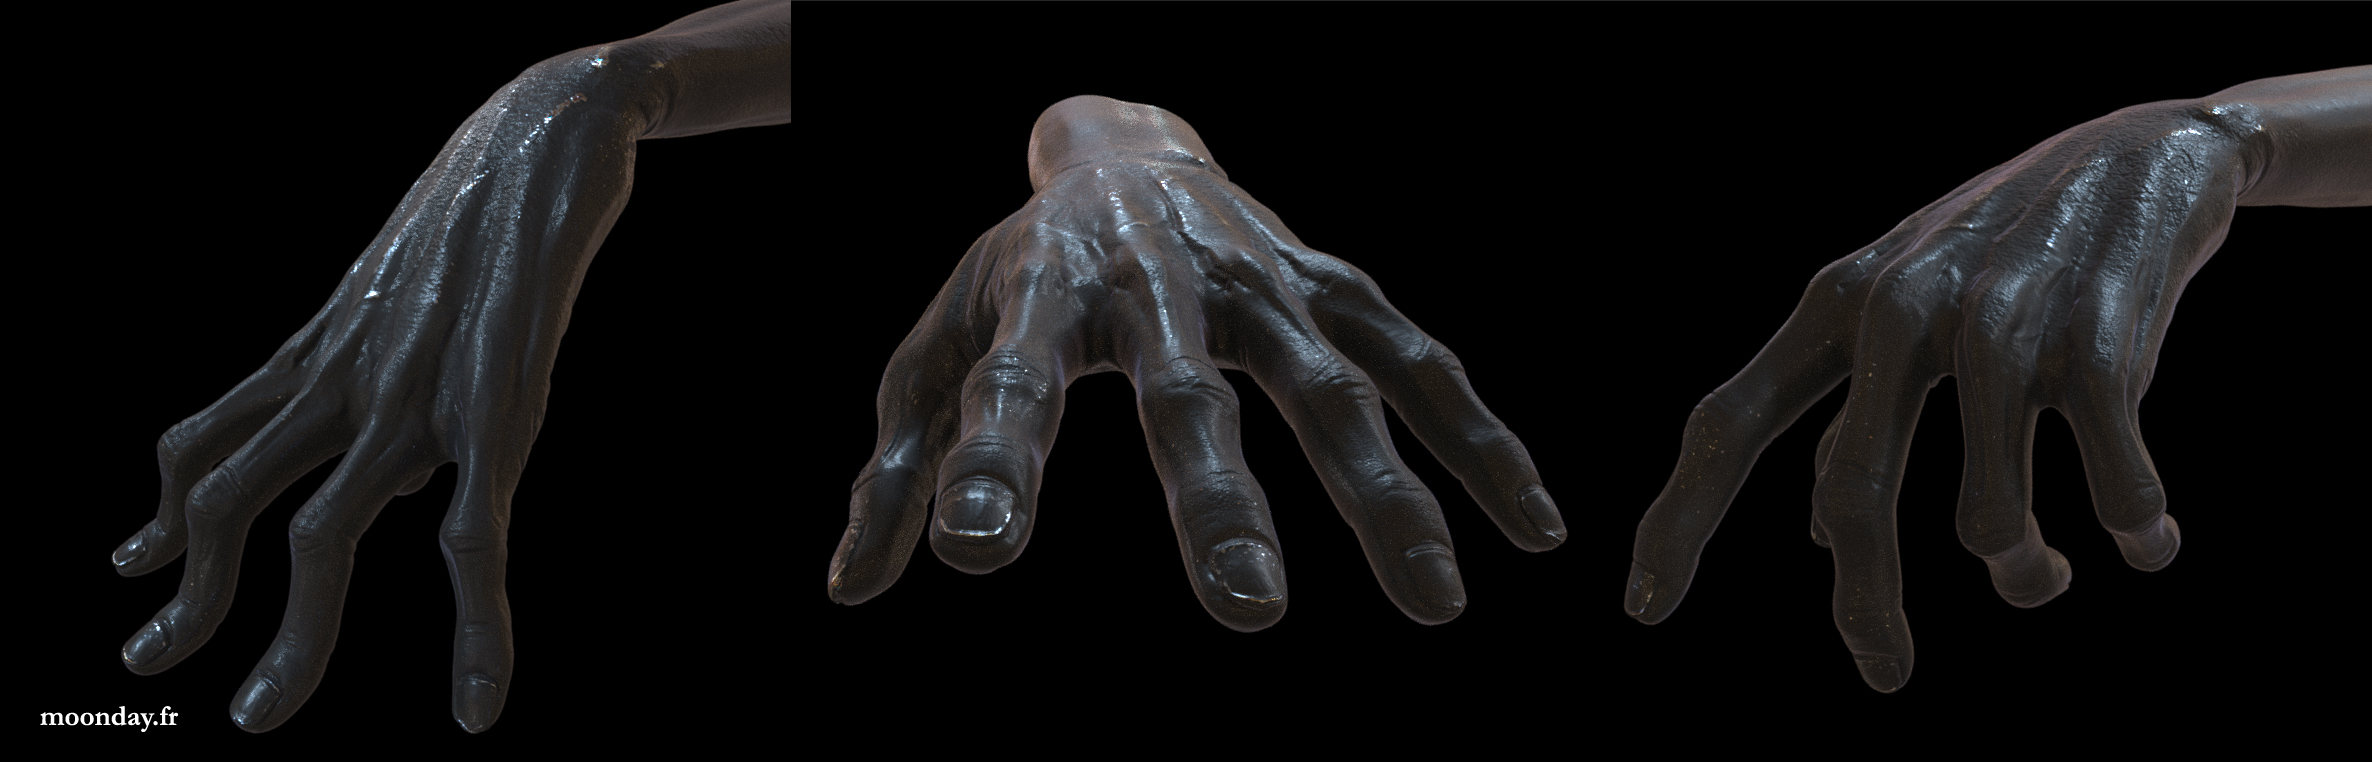
On the other news, the hands have been enhanced by an automatic deformation process based on Reaction manager linked to a morpher modifier and some skin morphs to smooth out the roundness of some joints.
Pour le reste des nouvelles, les mains ont été améliorée avec un système de déformation automatique à base de Morpher lié à un Reaction manager et quelques skin morphs pour durcir certains angles.
Shader updated as well
Auto Morpher in action
Skin morphs On / Off
Some fake translucency shader tests have been done, mostly to update the old textures already created, this time all is done with substance and many OSL + Arnold nodes in Max material editor.
Quelques tests de shader de fausse transparence ont été lancés mais c’était principalement pour mettre à jour d’anciennes textures, cette fois générées via Substance Designer et un mix de node OSL et Arnold dans le material editor