I’d like to share with you some of the method I used to create the environment you can see in the teaser.
Mountains
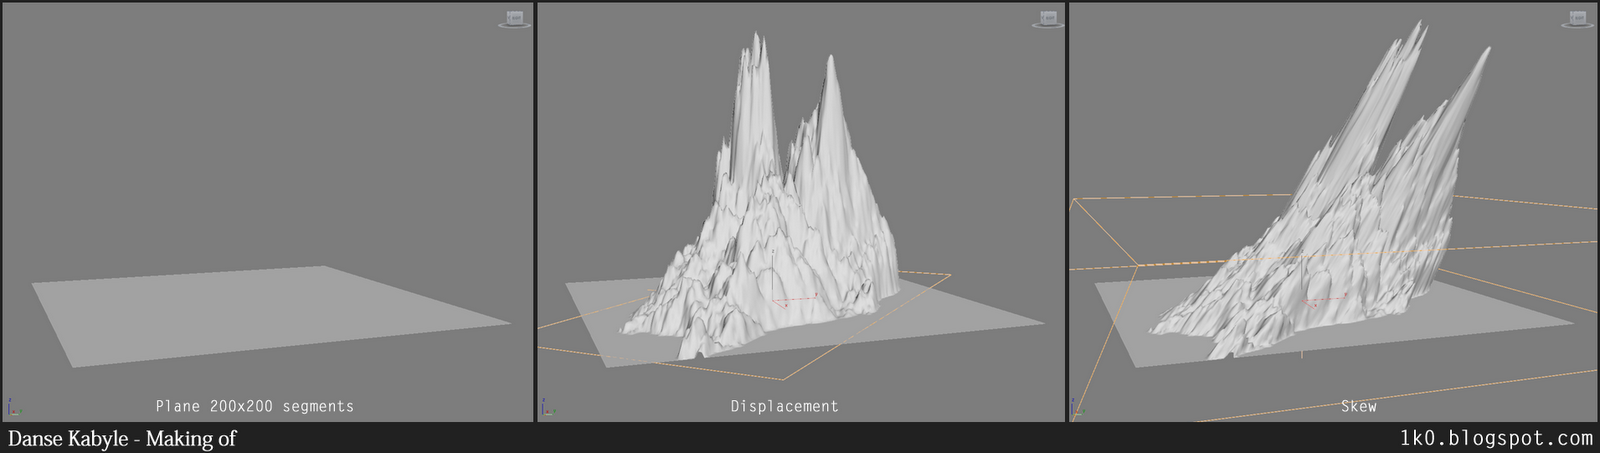
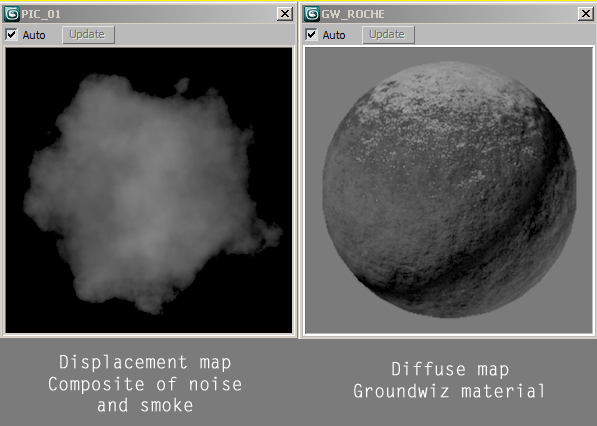

Rocks were created in the viewport using a plan, displacement modifier and some deformable modifiers like “Skew”. You can have a lot of fun by mixing all these modifiers. Composite material was used to displace the plan geometry on Y axys, it’s a mix of noise, smoke, use of masks to get the desired shape.
The diffuse map is from a Groundwiz material coming with the free version you can download on their website. Some options are blocked in this version but what is proposed was enough for me (for the moment)
You have more controls for the layers instead of what you have in the Landscape lume material and the bump effect is nicely done.
Mountains in the background are generated the same way, using custom height map I created using Terragen 2, I exported my terrain as a .ter file and used TerraConv to extract height information to a Tiff file. I also use these height maps as custom brushes to sculpt my flying rocks in Zbrush.
Displacement (the one created in the render) was only applied to some of the flying rocks in the first 2 shots of the teaser.
Nature
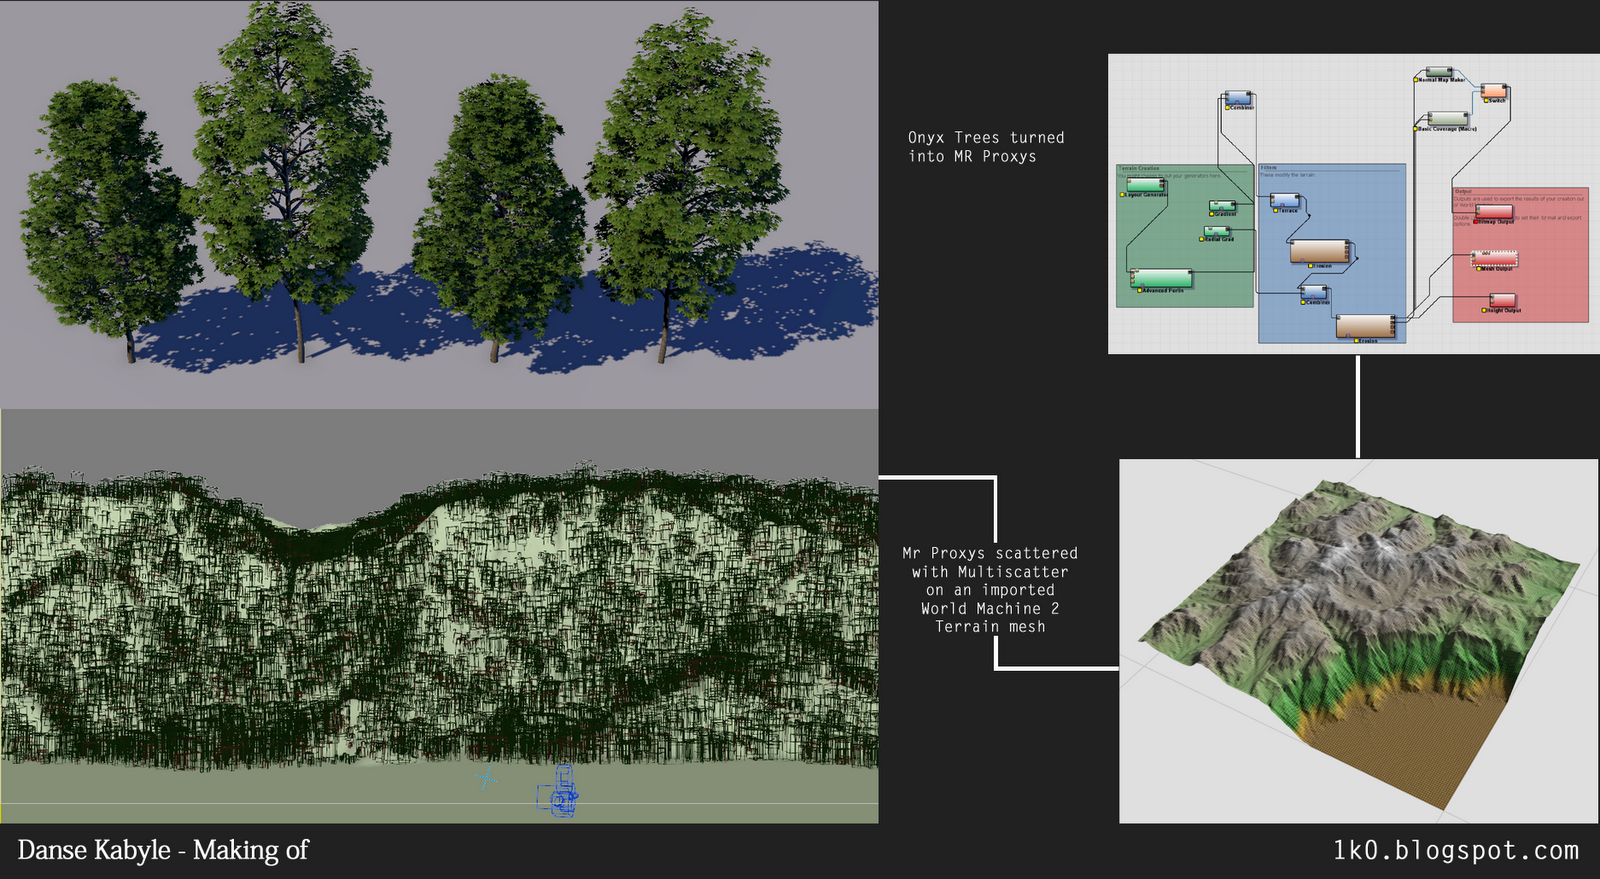

Trees were generated with Onyx tree then converted to Mr Proxy and scattered with Multiscatter on the ground geometry.
World Machine 2 trial version helped me to create some close up terrains, it’s a really good terrain generator and what you see in the viewport is what your got in the export/render.
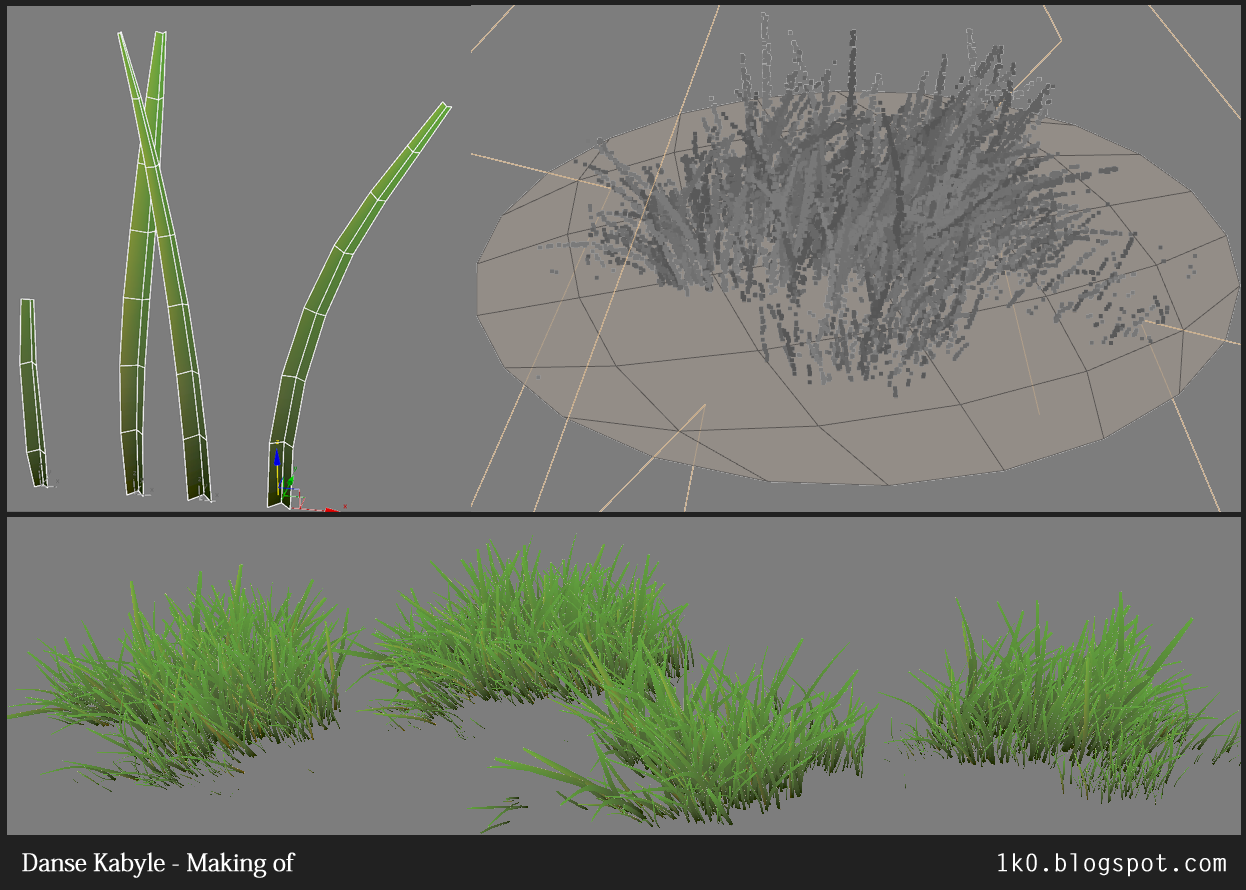
Grass was the fun part. One problem occurs: when you use geometry way VS textured plans with cutout map, you need to increase the anti-aliasing sample value. That was impossible for me at the moment I rendered my grass pass because the contest ended the day after.
Anyway creating poly blades and scatter them in patch of grass will be the way to go for rendering remaining shots.
Multiscatter allow you to use maps/textures to rotate, scale, etc your instances, to achieve whatever look you want.
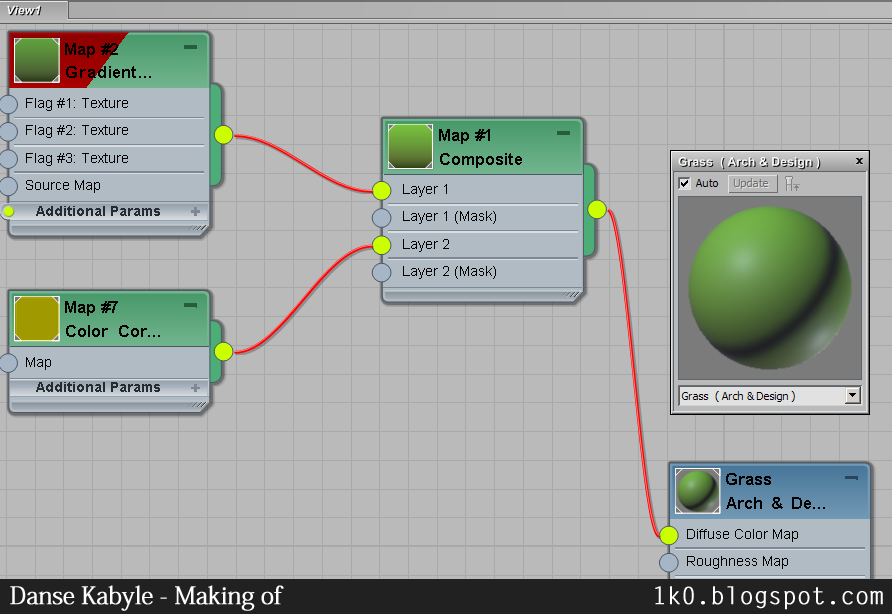
Grass material is a simple arc&design with gradient and glossy reflection, “highlight and final gather only” option checked. No need for translucency material here.
I choose to model bark instead of using displacement map in the render, first because I like to play and find new way to create complex things and secondly because it would have take the hell of time to render.
The process is easy, drawing splines on a texture reference, extrude the geometry apply the texture to the bark parts then, scatter them following object’s normals. Once the scatter looks good, collapse instances in a single mesh and turn it in a Mr Proxy, then play with modifiers such as bend, twist, whatever you like. (Tessellate or turbosmooth only if you’re running Max 2012)
To avoid Mental ray fatal error message like “who do you think you are?! I won’t render that amount of geometry”, (Mr Proxy + Final gather map writing) x Backburner² was the solution.
Sky

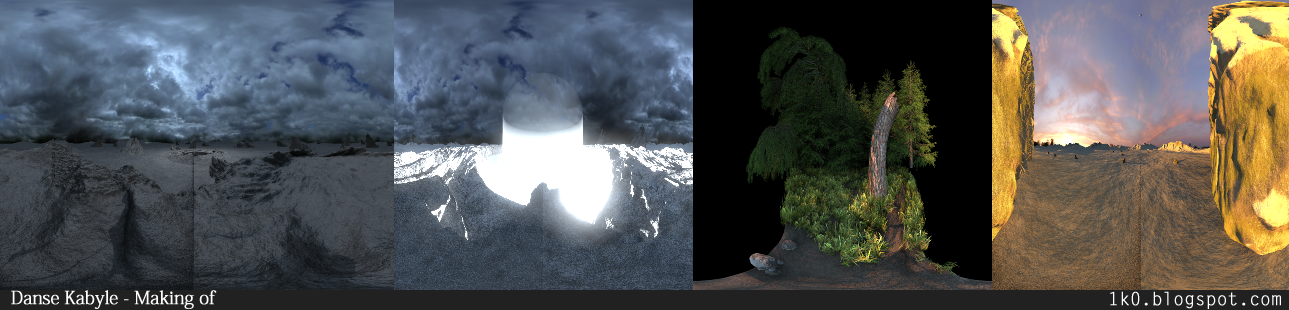
Easiest part, only needed to wake up early to catch the sun rising. GH1+Peleng 8mm… Without tripod and panoramic head (houuuu, I know). As these environments appear only in the character reflections I didn’t need to make a perfect shooting.
CG 360° environment were also created from 3dsmax to be applied on the character scenes as environment reflection, this way I had 2 scenes to work with so I could focus on each steps: Animation/VFX and Landscape.
Clouds, you don’t see a lot in the teaser, are created using the Jonas Ussing method.