
Facial motion capture retargeting
While working on Cuddles project I thought it was time to update its facial morph targets/blend shapes to be even more close to the original facial performance. The current solution I had was to edit each target mesh by adjusting the polygon position here and there in Zbrush, around 50 targets. The issue: I takes weeks for such process.
The other solution: Try to use the mocap face mesh as a deformer to adjust Cuddles face and extract new morph target from all this mess. It’s a lazy solution but it works.
There is 2 ways to use this method: you can either “directly” retarget the animation or use this process to create morph targets to be used in every animated scenes, I went with this 2nd way to clean up this messy workflow.
Here is the resumed process:
- Simplify the mocap base mesh and rename it “face_light”
- Apply a Skinwrap modifier to “face_light” with the mocap mesh as source
- Create helpers on each vertices (if we are patient) or faces on “face_light”
- Apply an attachment constraint to the helpers to make them stick to “face_light”
- Clone the mesh that needs to be animated, rename it “target_mesh”
- With an edit poly modifier, deform that “target_mesh” to roughly conform it to “face_light”. Create a copy of “target_mesh”, name it “target_face” and simplify the mesh
- Apply a skin modifier to the “target_face”, use the constrained helpers as bones, adjust the influences.
- Still on “target_face”, record the animated deformation in a Point cache modifier
- Still on “target_face”, apply a skinwrap modifier with “target_mesh” as source then apply a Morpher modifier and use the original mesh used in step 5 as target and set it to 100%
- Still on “target_face”, move the point cache modifier on top of the morpher modifier and tick “Relative offset” option
- Finally, create a vertex selection on the original mesh that needs to be animated and use “target_face” as source mesh in a skinwrap modifier
- As said earlier, the recorded animation can be the original mocap file or you can animate the mocap mesh morpher target one after the other with 0 and 100% keyframes to create future targets to be extracted. Of course, depending on the work you’ve done on the skinning process (the tricky part) you’ll need to adjust the meshes more or less to get clean targets.
Of course, I’m not a max script coder artist and all this process is still fresh in my mind, therefore we can surely simplify many steps to avoid headaches, feel free to share your ideas!
Now, let’s take a closer look at each step:
En travaillant sur le projet Cuddles je me suis dit qu’il était temps de mettre à jour ses morph targets/blend shapes pour obtenir une animation encore plus proche de celle de l’actrice.
La solution habituelle consiste à éditer chaque morph en ajustant la position des polygones ici et là. Environ 50 modèles à modifier et ce, même sous Zbrush, cela prend énormément de temps.
L’autre solution: Essayer d’utiliser le modèle source de la mocap pour déformer et ajuster le visage de Cuddles en extrayant de nouvelles morph targets. C’est une solution de fainéant mais ça fonctionne.
Il y a 2 façons d’utiliser cette méthode, on peut soit “directement” utiliser l’animation mocap ou alors, utiliser ce procédé pour créer des morph targets à utilise dans toutes ses animations. Je suis partie sur cette seconde option pour obtenir un workflow propre.
Voici le procédé résumé:
- Simplifier le mesh de mocap source
- Transfert d’animation via Skinwrap à ce mesh en utilisant le modèle de mocap en tant que source
- Créer des helpers sur chaque vertex (si on est patient) ou chaque face du mesh “face_light”
- Appliquer une contrainte d’attachement de surface aux helpers pour leur faire suivre l’animation de “face_light”
- Créer une copie du mesh devant recevoir l’animation et le nommer “target_mesh”
- A l’aide d’un modificateur edit poly, déformer le mesh “target_mesh” afin de le conformer à “face_light”, créer une copie de “target_mesh”, la nommer “target_face” et simplifier le mesh
- Appliquer un modificateur skin à “target_face”, utiliser les helpers en tant que bones, ajuster les influences.
- Toujours sur “target_face”, Enregistrer la déformation animée du visage dans un modificateur Point cache
- Toujours sur “target_face”, appliquer un modificateur skinwrap avec “target_mesh” en tant que source puis appliquer un modificateur morpher à “target mesh” avec comme source le mesh original utilisé en étape 5
- Toujours sur “target_face”, déplacer le modificateur point cache au sommet de la liste des modificateur et cocher “Relative offset” dans le Point Cache
- Enfin, créer une sélection de vertex dans me mesh devant être animer et utiliser “target_face” comme source dans un skinwrap
- Comme dit plus haut, l’animation enregistrée dans le Point cache peut soit être la prise mocap, soit une animation keyframe du morpher du mesh source mocap pour montrer toutes les morph targets à la suite. Bien sur, comme tout dépend du taf que vous aurez effectué lors de la phase de skinning (étape pointilleuse), vous aurez peut-être du nettoyage à effectuer ici et là sur les morph targets créées.
Bien entendu, je ne suis pas un expert en Max Script et tout ce procédé, toujours un peu frais dans mon esprit, peut surement être optimisé pour éviter les prises de têtes, n’hésitez pas à partager vos idées!
Regardons à présent les étapes plus en détail:
Step 1
Simplify the mocap base mesh
Create a clone from the mocap face mesh, suppress all the polygons that are not affected by the motion, back of the head, neck, etc. Then remove some edge loops and try to keep it low without losing too much facial features. You can remove teeth and any inner mouth parts if you want to create a specific mesh for that part of the character your project (what I did on Cuddles).
Simplifier le mesh de mocap source
Créer une copie du mesh de mocap source, supprimer tous les polygones non affectés par l’animation, arrière du crâne, cou, etc. Supprimer certains edge loops pour obtenir un modèle léger tout en gardant un maximum de densité dans les zones animées. L’intérieur de la bouche peut être retiré si vous voulez créer un mesh à part pour cette zone (effectué pour Cuddles).

Left: Mocap mesh source / Right: simplified mesh
Step 2
Apply a Skinwrap modifier to “face_light” with the mocap mesh as source
To retrieve the original animation on the new light mesh we use a skinwrap modifier that will use the original mocap mesh as an active deformer. Play with the modifier parameters to get a perfect motion matching.
Transfert d’animation via Skinwrap
Afin de récupérer l’animation originale sur le nouveau modèle léger qui vient d’être créé, appliquer un modificateur skin wrap qui utilisera le mesh mocap source en tant que mesh de déformation. Jouer avec les paramètres pour obtenir une correspondance parfaite.
Left: Face_light animated from the skinwrap modifier / Right: skinwrap modifier applied on the mesh
Step 3 & 4
Create helpers and constrain them
Now we have basic animation applied on the light mesh, we can create as many helpers as there are faces on the mesh. what I did was to create 1 helper, applied a face attachement constraint, picked the light mesh as constrain source and THEN I duplicated the helpers to avoid a too long process. However, I still had to select each helpers and manually adjust their position on the mesh in the constrain menu.
Créer des helpers et les contraindre
Maintenant que l’animation de base est appliqué au mesh optimisé, nous pouvons créer autant de helpers qu’il y a de faces sur le maillage. Afin de gagner du temps j’ai créé un dummy auquel j’ai appliqué un attachement constraint et sélectionné le mesh optimisé comme source et SEULEMENT APRÈS j’ai dupliqué ce helpers (environ 300 fois dans mon cas). Cependant j’ai du sélectionner et ajuster les positions des helpers un par un dans les options du attachement constraint.
Left: Helpers animated from the constraint / Right: Attachment constraint settings
Step 5
Clone the mesh that needs to be animated
Let’s go back on the mesh that we need to transfer the animation. Rename the mesh “original_mesh” and create a copy, not an instance, name it “target_mesh”.
Dupliquer le mesh devant recevoir le transfert d’animation
Retournons sur le mesh qui doit recevoir l’animation au final. Le renommer “original_mesh” et créons une copie, pas une instance, à nommer “target_mesh”
Step 6
Deform the mesh
With and edit poly modifier or using Zbrush, move the faces of the target_mesh to roughly match the face_light mesh. Keep in mind you need to move the eye areas of the target_mesh to the eye areas of the face_light mesh, same for nose, chin, etc. It is important these areas match as closely as possible. Of course the topology of the 2 meshes are different (here) but try to keep volumes the right way.
Once this step is done, create a copy, not instance, of target_mesh and name it target_face.
(We will use target_mesh again later the process.)
Here again, we can simplify the mesh to only use the polygons that will be animated. In my example I applied an edit poly modifier to target_face and only used the face area by removing the character ears, neck, back and sides of the head, it will ease the next processes
Deformer le mesh
Avec l’aide d’un modificateur edit poly ou Zbrush, déplacer les faces de target_mesh pour correspondre à face_light. Gardez en tête que la zone des yeux de target_mesh doit correspondre avec la zone des yeux de face_light, de même pour le menton, les cou, etc.Il est important que ces zones correspondent le plus possible. Bien sur la topology de ces 2 modèles diffèrent (ici) mais il faut essayer de garder des volumes similaires.
Une fois cette étape passée, créer une copie, toujours pas d’instance, de target_mesh et la nommer “target_face”.
(Nous utiliserons target_mesh à nouveau un peu plus tard dans le procédé.)
Ici encore, nous pouvons simplifier le mesh pour n’utiliser que les polygones qui seront animés. Dans mon exemple j’ai appliqué un modificateur edit poly à target_face et j’ai seulement gardé la partie du visage en supprimant le reste, cela simplifiera les prochaines étapes.
Left: Original mesh / Middle: deformed mesh “target_mesh” / Right: adjusted version “target_face”
Step 7
Transfer the animation
Apply a skin modifier to the target_face, use the constrained helpers as bones, adjust the envelopes and vertex influences in the modifier. It may take some times and effort to get the best skinning possible here, be careful in the lips and eyes areas.
Transférer l’animation
Appliquer un modificateur skin à target_face, utiliser les helpers contraints en tant que bones, ajuster les enveloppes et le poids des vertex. Cette étape pourra prendre du temps pour obtenir le meilleur skin possible. Prêtez une attention toute particulière aux zones des yeux et des lèvres.

The other tidiest part of the process, don’t hesitate to use weight tools
Step 8
Animation recording
Still on target_face, record the skinned animated deformations in a Point cache modifier. From here you have two choices:
- Record the original mocap animation
- Record facial poses by animating the original morpher targets of the mocap source mesh
Let’s say you want clean work and use the 2nd choice: on the mocap source mesh, create 3 keyframes on the morpher for all targets:
- At frame 00 = All morph at 0%
- At frame 01 = All morph at 100%
- At frame 02 = All morph at 0%
Then interpolate the keyframe ranges in the curve or dope sheet editor to create an animation going through all targets.
Enregistrement d’animation
Toujours sur target_face, enregistrer l’animation obtenue avec le skinning via un modificateur Point cache. A partir d’ici vous avez deux choix:
- Enregistrer la prise mocap
- Enregistrer les poses faciales en animant les valeurs dans le morpher du mesh de mocap source
Disons que vous décidiez d’avoir un travail propre en choisissant la 2ème option: Sur le mesh de mocap source, dans le modificateur morpher, créer 3 keyframes pour toutes les morph targets:
- Image 00 = Toutes les morph targets à 0%
- Image 01 = Toutes les morph targets à 100%
- Image 02 = Toutes les morph targets à 0%
Il suffit ensuite d’interpoler les keyframes dans le curve ou dope sheet editor afin d’obtenir une animation qui passe par toutes les morph targets.
2nd choice results. Keep in mind my mesh was terrible because I was still in the development phase of this entire workflow
Step 9
Morphing back
Still on target_face, add a skinwrapp modifier and use target_mesh as source, as these 2 meshes are very similar, the skinwrapping should work perfectly.
Then apply a Morpher modifier on target_mesh and use the original_mesh, used in step 5 to create a clone, as target and set it to 100%
This way we can go back to the original mesh state and the target_face will also deform to the original state with the help of the skinwrap modifier applied in last step.
Of course, for this process to work you must have keep the same vertex number and order, meaning, you didn’t suppress or add any faces/polygon in the earlier steps between the original_mesh and the target_mesh.
Morphing en arrière
Toujours sur target_face, ajouter un modificateur skinwrapp et utiliser target_mesh comme source, comme ces 2 modèles se ressemblent beaucoup, le skinwrapp devrait fonctionner à merveille.
Ensuite, appliquer un modificateur Morpher sur target_mesh et utiliser original_mesh, utilisé en étape 5 pour créer un clone, en tant que target et le paramétrer à 100%.
De cette façon nous pouvons retourner à l’état original du mesh et target_face va suivre le morph via le skinwrap appliqué dans l’étape précédente.
Bien sur, pour que cette étape fonctionne, il faut avoir gardé le même nombre et ordre des vertex, ce qui veut dire “pas de suppression ou d’ajout de faces” dans les étapes précédentes entre original_mesh et target_mesh.
target_face (pink) skinwrapped on target_mesh (green) morphed to the original_mesh (not visible)
Step 10
Applying animation
Still on target_face, we can see now the result of the point cached animation recorded in step 8. For this, we need to move the Point cache modifier on top of the skinwrap in the modifier stack. However, when we hit play, we encounter an issue, the deformation is terrible or we see the human face shape from the mocap source mesh. This can be solved by activating “Relative offset” option in the Point cache modifier.
Appliquer l’animation
Toujours sur target_face,nous pouvons maintenant voir le résultat de l’animation enregistré dans l’étape 8. Pour se faire, il faut déplace le modificateur Point cache au dessus du skinwrap, le mettre au sommet dans la liste des modificateurs. Cependant, lorsque nous lisons l’animation, la déformation est affreuse ou le mesh reprend la forme d’un visage humain. Pour régler ce soucis il suffit d’activer l’option “Relative offset” dans le modificateur Point cache.
Relative offset Off and On
Step 11
End results
Finally, select the original mesh that needs to be animated, create a vertex selection on the face, apply a Skinwrap modifier and use target_face as source. Warning: To be able to use target_face as source, you need to collapse or remove the skin and skinwrap and only keep the Point Cache in the modifiers stack. You can now create morph targets of your entire mesh head (in my example) base on the face animation transferred and recorded to target_face.
What I did in my scene: select the original mesh that should be now animated for around XX frames (XX = morph targets amount) and go in the tools (top bar menu) to create snapshots of the mesh for each frame, then you’ll have to properly rename the snapshots: eyebrow_up_left, eyebrow_inner_up and so on.
Résultat final
Enfin, sélectionner le mesh qui devra recevoir l’animation au final, créer une sélection de vertex sur la face, appliquer un modificateur Skinwrap et utiliser target_face en tant que source. Attention: Pour être en mesure d’utiliser target_face comme source, il faut écraser la pile des modificateur ou supprimer les modificateur skin et skinwrap et seulement garder le Point Cache dans la liste. Nous pouvons à présent créer les morph targets pour notre mesh, une tête entière (dans mon exemple) basé sur l’animation transférée à et enregistrée pour target_face.
Ce que j’ai fait dans ma scène: sélectionner le mesh original qui doit être maintenant animé sur XX images (XX = le nombre de morph targets), aller dans le menu tools (top bar menu) pour créer des snapshots du mesh pour chaque image, il ne restera plus qu’à renommer les snapshots: eyebrow_up_left, eyebrow_inner_up and so on.

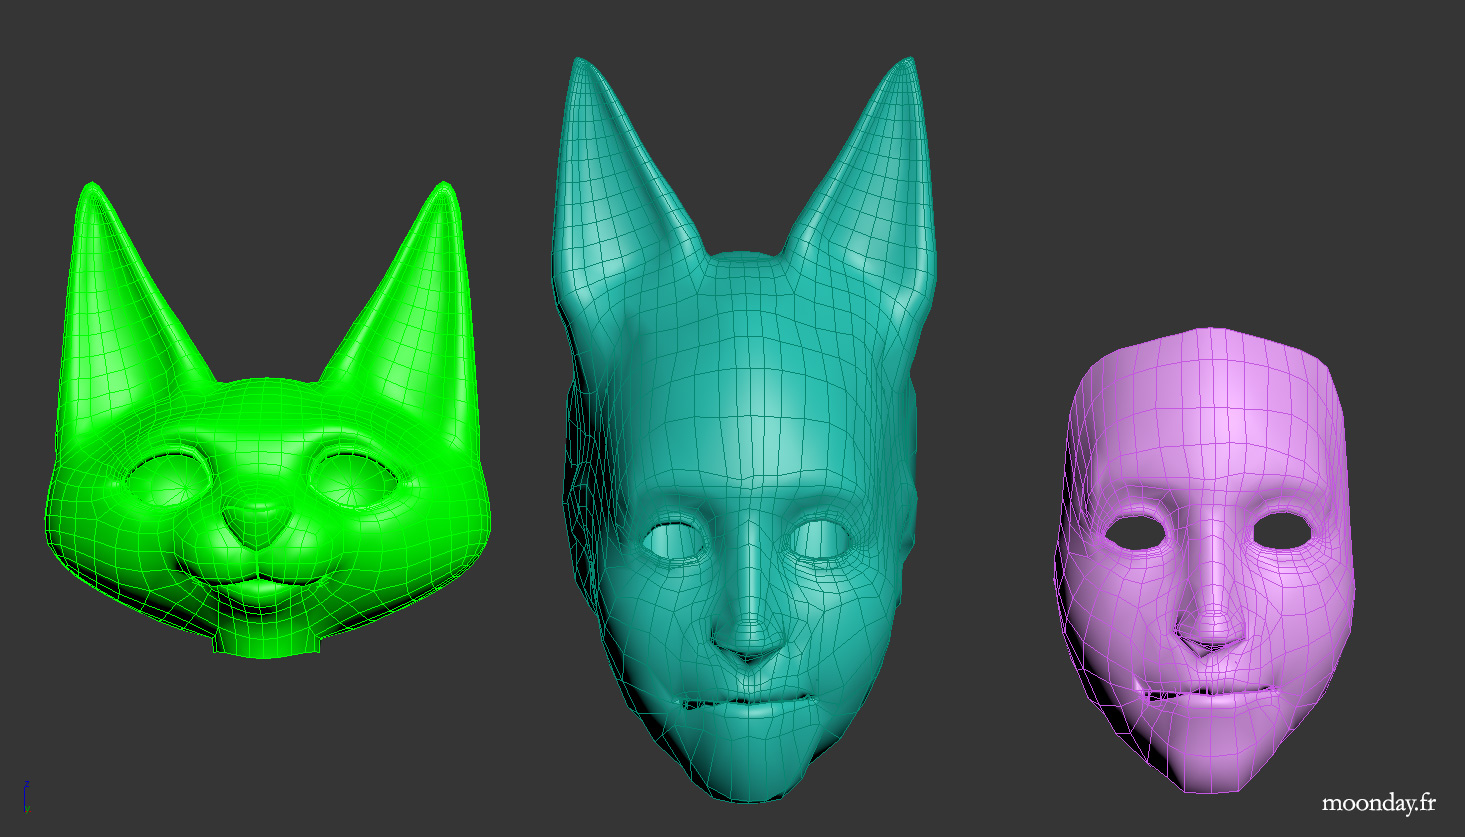
original_mesh (yellow) skinwrapped to target_face (pink)
Now you understand why steps 6 and 7 are really important. Anyway you can clean your new targets with some edit poly adjustment, relax here and there.
Conclusion
While writing this article I got some ideas to simplify the process, mostly on the helpers/skinning parts. We can certainly generate particles in Tyflow on the face_light mesh to be used as skin deformer to ease these steps, I’ll try to investigate this idea as soon as I have free time ಠ‿ಠ
I hope you understood my process and hope it will be useful in your projects. Feel free to share your own process and ideas!
En rédigeant cet article, j’ai eu quelques idées pour simplifier le tout, surtout au niveau des étapes sur les helpers et le skinning. Nous pouvons surement utiliser des particules via Tyflow sur face_light en tant que bones pour un skin plus facile à appliquer, je vais tester cela dès que j’ai du temps libre ಠ‿ಠ
J’espère que vous avez compris le procédé et qu’il vous sera utile pour vos projets. Faites moi part de vos procédés et idées!