
After some tests, a few bad and a lot of good results here are my 2 cents on Agisoft Photoscan.
As said earlier I had some troubles getting good results on my first scans the reason is I didn’t get the right shooting workflow, so here are some tips on the shooting process:
– Avoid pure plain color/ no details in the backround,
– Avoid huge F-stops values, between F.3 and F.6 gave me good results,
– A lot of overlap between pictures is better as it gives you more points in the cloud,
– Bigger image resolution will give you more points in the photos alignment process too,
– Try shooting with diffuse light and shadows if you plan to use the pictures as textures too,
– Don’t try to scan high reflective objects.
How accurate is the model generated?
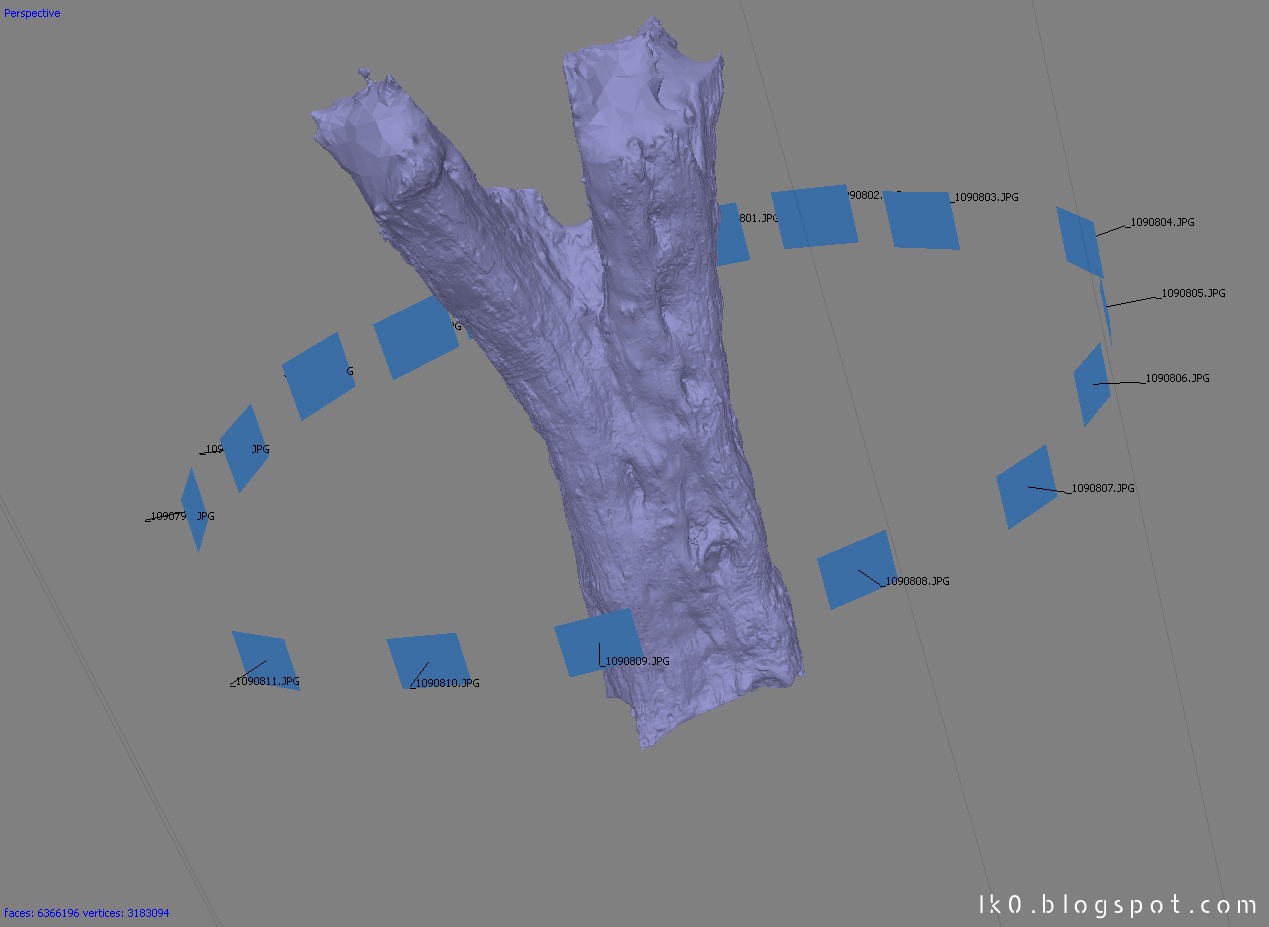
As you can see on this tree, it caught a lot of details. In blue are the cameras the software aligned by some kind of sorcery.
Below is a video edit of tests made with that model and a turntable.
In all these examples, the diffuse is used as bump.
38 photos for that one, GH1 + 14-140mm at 14mm. Of course using rough scanned data isn’t a good idea, that’s why you need to transfer all details from the scan to a retopologised model, this way you can use displacement and bump maps and work with a lighter scene.
What about living models?
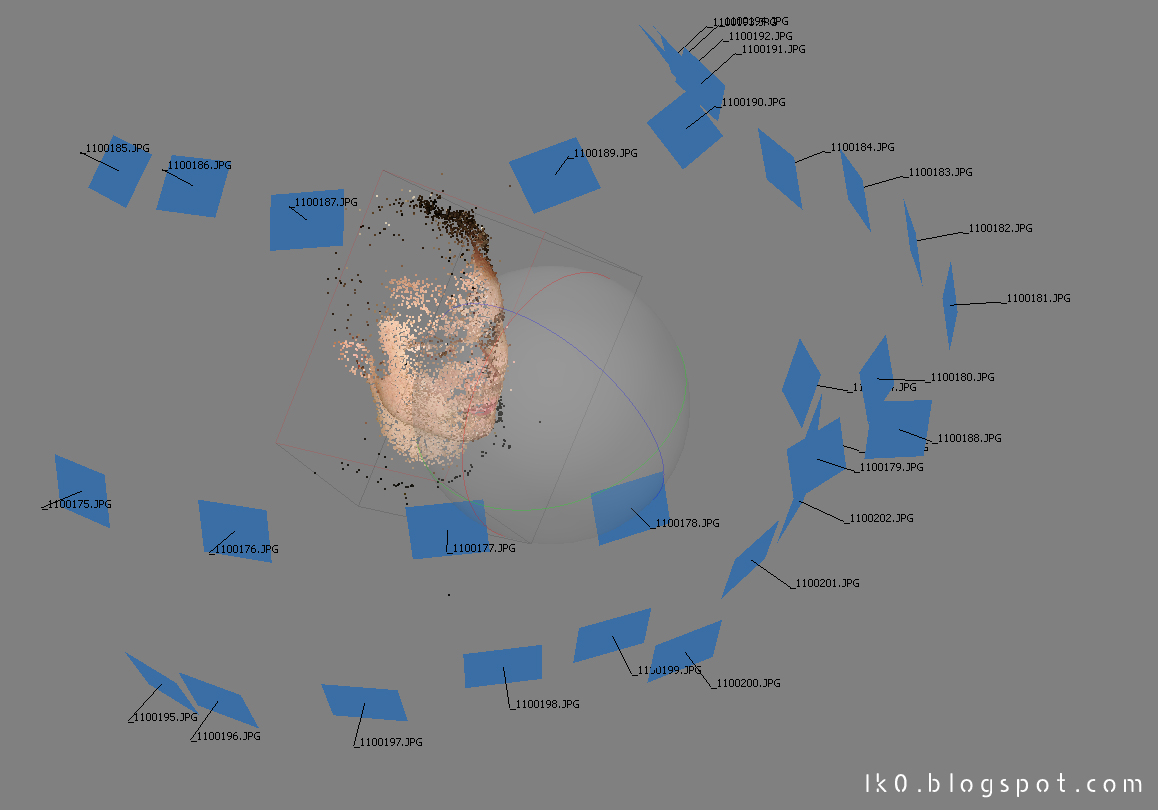
Unless you are Lee Perry-Smith and have a big DSLR rig and a photostudio, you’ll have to turn around your model trying to stay as still as possible, be sure to put him/her on a couch with pillows to hold him/her in a calm pose. Then shoot as fast as possible without passing between the subject and light sources (challenge failed for that scan ^^), the goal is to shoot a half sphere around the person face.

Results are noisy but you got a good basic mesh, once you cleaned it a bit, made a new topology and projected smoothed details+diffuse map you can now go on and add sculpt details, make it look more cartoony, whatever you want (for that test the end result is really smoothed).
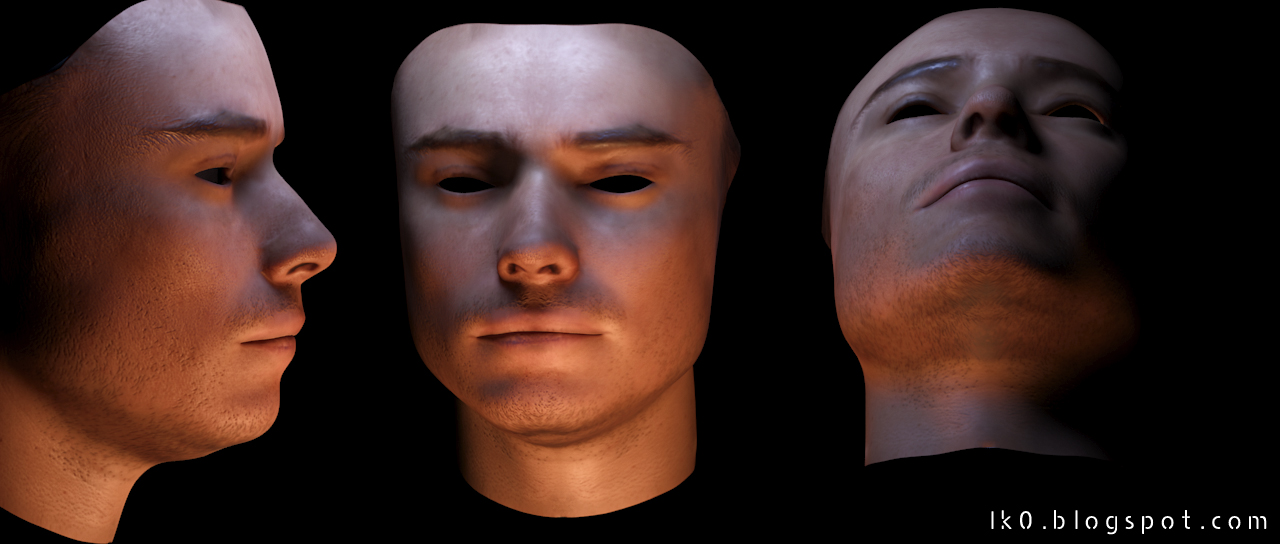
Same model with SSS shader, Imagine all the fun we can have with sculpt work, good maps, hair&fur and good lighting!
Why shoot a lot of pictures fast around the model when you can shoot him in FHD video mode? Well, video mode isn’t as detailed as photo mode on DSLR but you can try with a Red Scarlet or a Black magic camera. Here is what I got with my GH1:
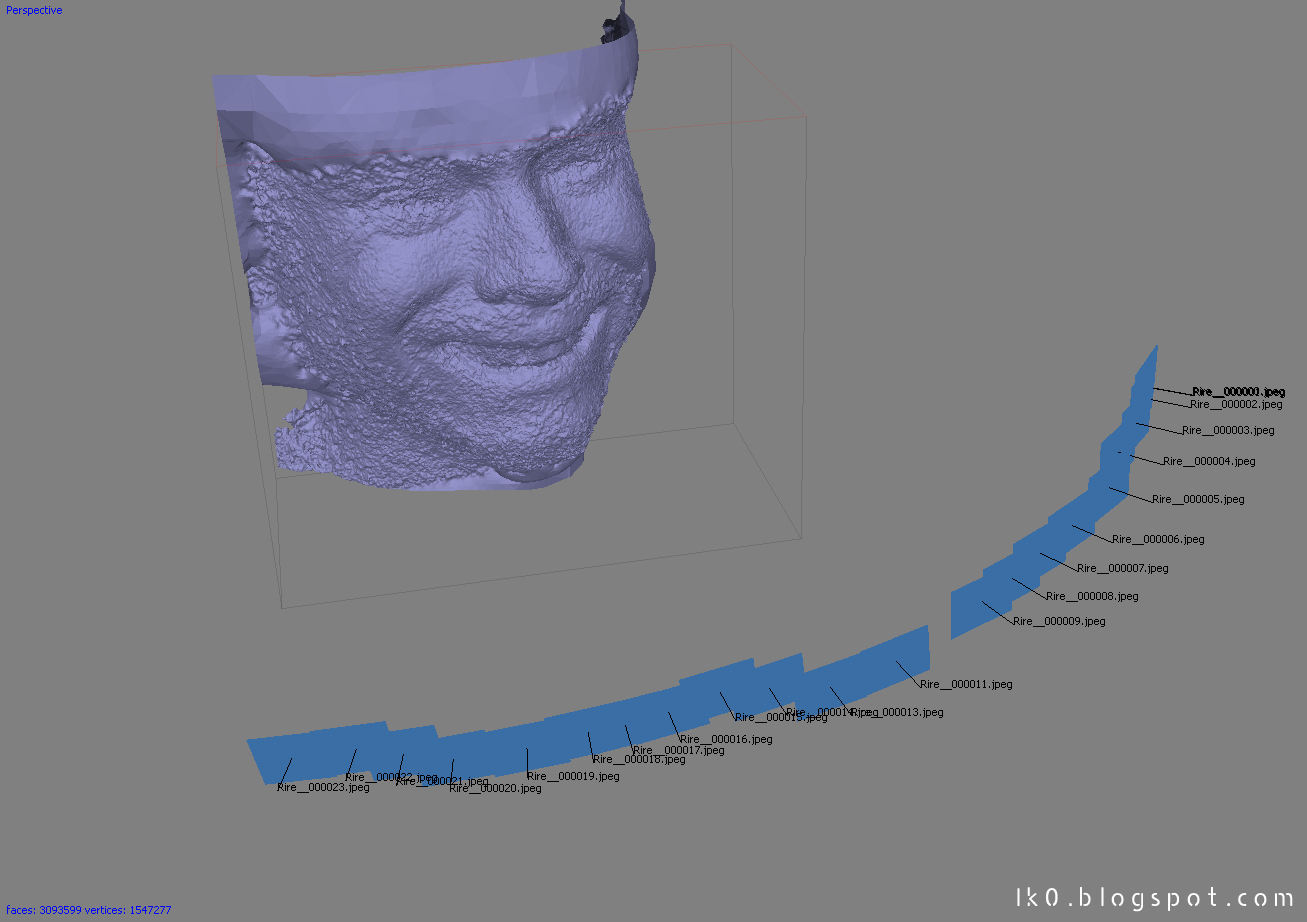
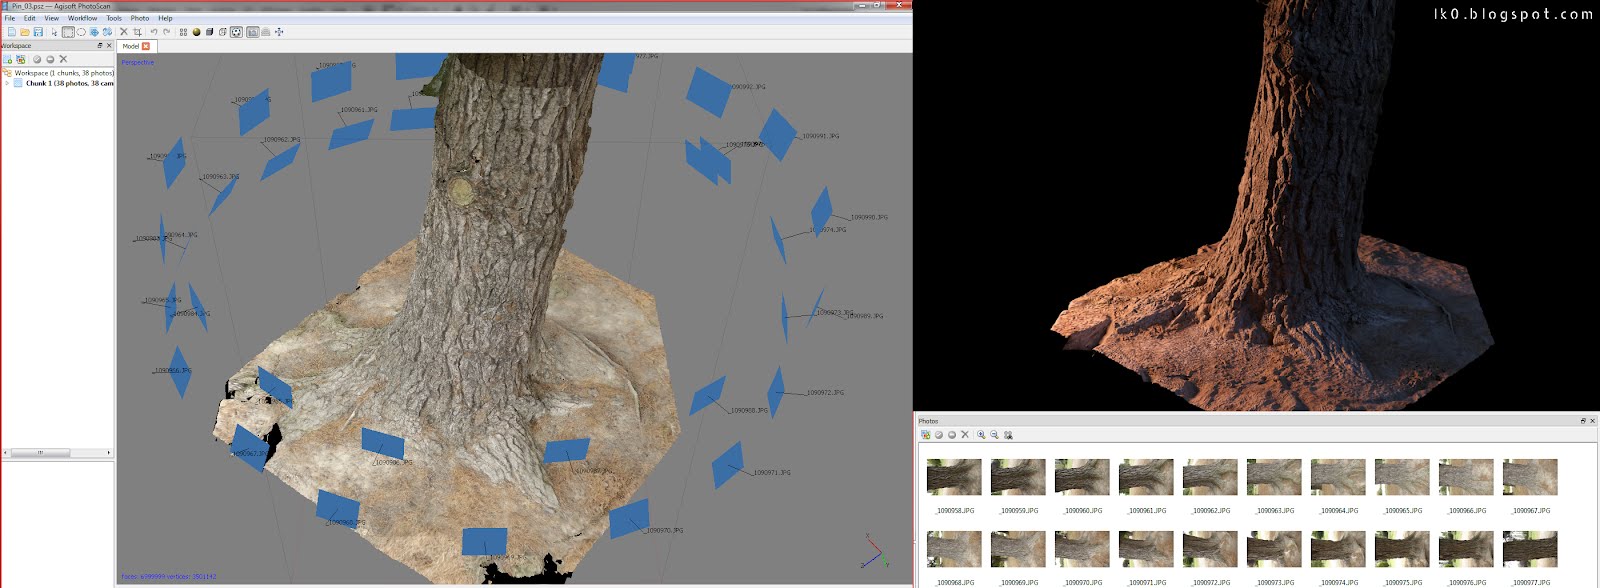
Not that bad, but the mesh quality is definitely not as dense and good as in earlier test. Less points found (between 1000 and 2000 vs 80000 for shoot from photos). Here I had to select “Ultra high” preset for the mesh generation, it only computed a 3.1 millions poly model. As an example, trees scan used the “Medium” preset with 9 millions poly limit on the decimation option. (my computer can’t handle more than 11 millions poly model computing).

How about small/complex models?
It becomes tricky. I’m still trying to figure why and how I got these artefacts. Not enough pictures maybe? Or image resolution not good enough because the model is too small? Anyway the software give these free mesh extensions on “opened” model most of the time, fortunately you can easily clean that in another 3D software and sculpt missing parts.
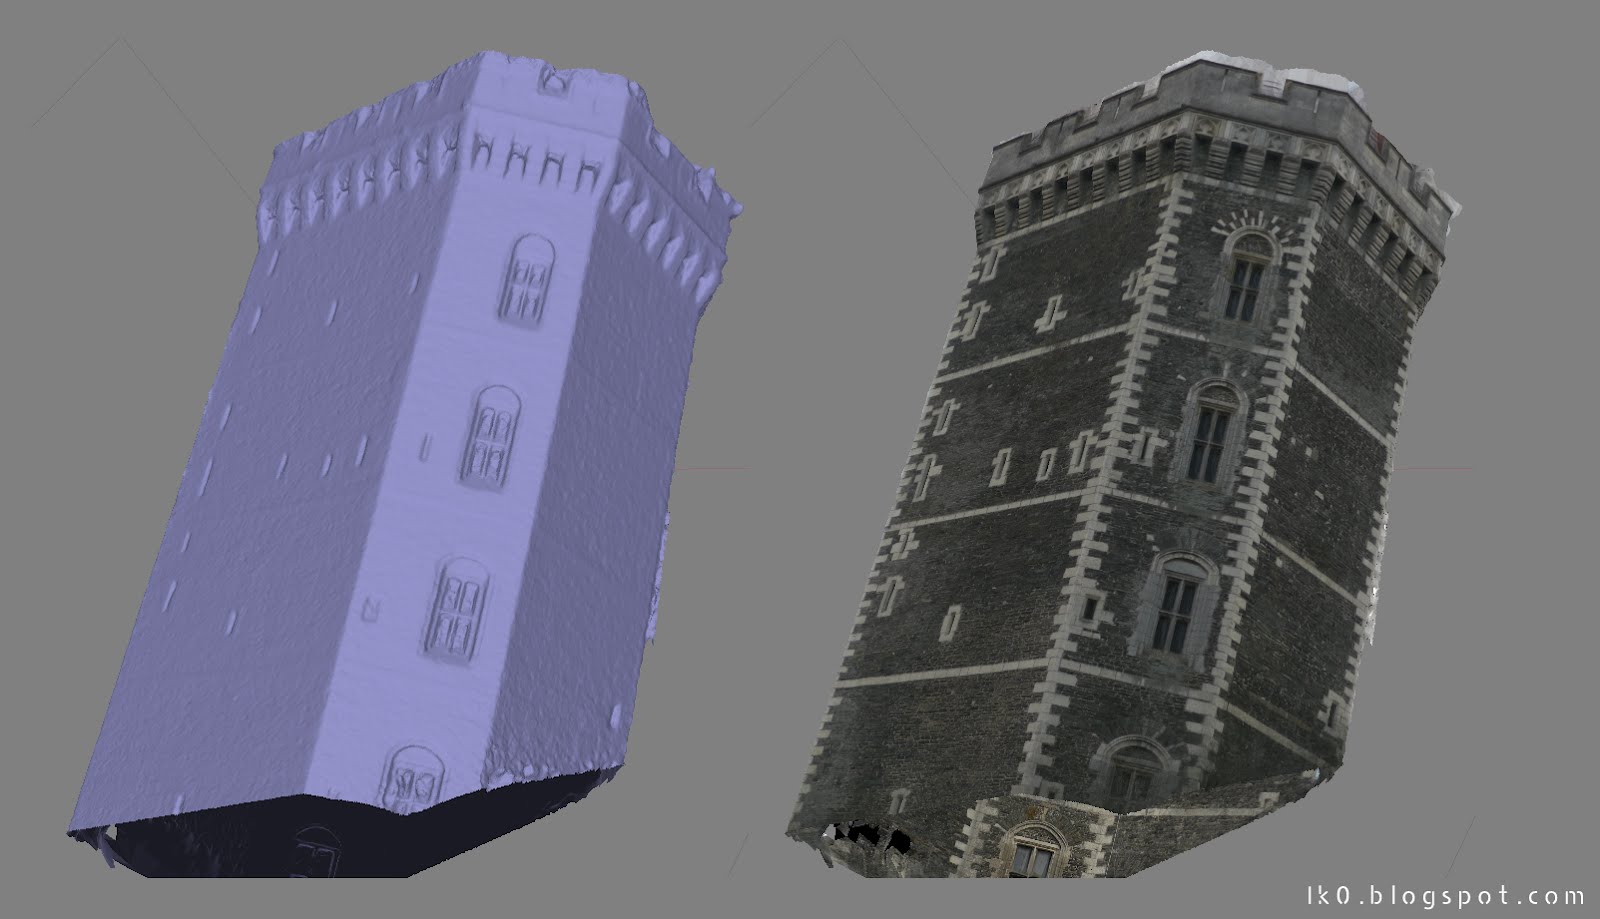
Organic models look fine, is it the same for hard surfaces?
It works.
There is really no point on using this software on building/house models except… It allows you to export your model AND the cameras in 3DS file format, from there you can use your scanned model as reference for your architectural project if you can’t afford 3D laser scanner.
I highly recommend that software for VFX purpose as it speeds up the workflow a lot! Of course it pushes the creativity part away… or not! If you wanted to use a human face or body as you base mesh to add armor, horn/mutation on the face you can really have fun focusing only on the stuff you wanted to add and not the base mesh + it’s another good way to learn retopology.